

How to Create Embroidery Designs Using Free Digital Tools
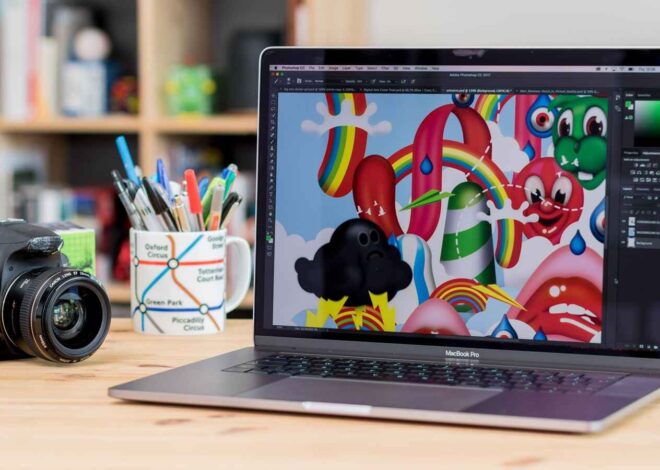
Embroidery is a fun way to turn art into thread on cloth. Many people start with simple shapes, names, or small logos. In the past, design work often needed costly tools. Today, many free digital tools help new users start with ease.One helpful way to begin is by using Freeware Embroidery Digitizing Software.
These tools help change art into stitch files that embroidery machines can read. With the right steps, even new users can make neat and clean designs for their projects.In this guide, we will walk through the full process in simple steps. You will learn how to plan a design, use free tools, and turn art into a stitch file. The goal is to help you learn the basics and build skill with time.
What Is Embroidery Digitizing?
Embroidery digitizing is the act of turning art into stitch data. A machine cannot read normal image files. It needs a special file that tells the needle where to stitch.
This file guides the machine through each step of the design. It shows:
- Where each stitch starts
- Where it ends
- What color thread to use
- How thick the stitches should be
Digitizing helps the design look clean and neat on cloth.
Why Free Digital Tools Are Helpful
Free tools are great for new users. They let people learn the basics of design work without paying for costly programs.
These tools help users:
- Learn design skills
- Practice stitch planning
- Test simple embroidery ideas
- Build small design projects
With time and practice, users can improve their work and create better designs.
Basic Tools You Need Before Starting
Before creating an embroidery design, it helps to have a few basic tools ready.
A Computer or Tablet
A computer or tablet helps you run design software. It also lets you edit images and test stitch paths.
Design Software
You will need software that can create embroidery stitch files. Free programs can help you start.
A Simple Image
A clear and simple image works best for first projects. Shapes, icons, or text are good starting points.
An Embroidery Machine
To stitch the design, you will need an embroidery machine that can read embroidery files.
Step-by-Step Process to Create an Embroidery Design
Creating an embroidery design takes a few steps. Each step helps prepare the art for stitching.
Step 1: Choose a Simple Image
Start with a clean image. Simple shapes and bold lines are easier to convert into stitches.
Good beginner designs include:
- Small logos
- Icons
- Names or letters
- Basic shapes
Busy images with many small parts can be hard for beginners.
Step 2: Clean the Artwork
Before digitizing, the artwork may need small changes.
You may need to:
- Remove extra background parts
- Smooth rough edges
- Reduce the number of colors
A clean image makes digitizing easier.
Step 3: Import the Image into the Software
Next, load the image into your design program.
The image will appear on the screen. You can use it as a guide while drawing stitch paths.
This step helps you trace shapes and plan the design layout.
Step 4: Trace the Design
Now you will trace the parts of the image.
Use drawing tools in the software to outline each shape.
Each section of the design becomes a stitch area. You can adjust the shape to match the image.
Tracing is one of the most important steps in digitizing.
Understanding Stitch Types
Embroidery designs use different types of stitches. Each type serves a special purpose.
Running Stitch
What It Is
A running stitch is a simple line of stitches.
When to Use It
It works well for outlines and thin details.
Satin Stitch
What It Is
Satin stitches form smooth and shiny lines.
When to Use It
They are great for text, borders, and narrow shapes.
Fill Stitch
What It Is
Fill stitches cover larger areas with thread.
When to Use It
They are used in big shapes like logos or patches.
Planning Stitch Direction
Stitch direction affects how the design looks.
Stitches can run in different angles. The direction helps shapes look smooth and natural.
Good stitch direction also helps light reflect from the thread in a nice way.
When planning stitch direction, think about the shape of the design.
Setting Stitch Density
Stitch density means how close stitches sit together.
If stitches are too tight, the fabric may wrinkle.
If stitches are too loose, gaps may appear.
Good digitizing keeps stitch spacing balanced.
Fabric type also affects density. Thick fabric needs stronger stitches, while thin fabric needs lighter ones.
Adding Underlay Stitches
Underlay stitches form the base of the design.
They sit under the top stitches and help support them.
Underlay helps:
- Hold fabric in place
- Improve stitch shape
- Prevent fabric shifting
Most strong embroidery designs include underlay stitches.
Choosing Thread Colors
Embroidery designs use thread instead of ink. So color planning is important.
Choose thread colors that match the artwork.
Try to keep the number of colors low. Too many color changes slow the machine.
Simple designs often look best with fewer colors.
Testing the Design
Before stitching the final design, it is important to test it.
A test stitch helps you see how the design looks on fabric.
During testing, check for:
- Smooth stitch flow
- Clean edges
- Correct color order
- Balanced stitch density
If problems appear, you can return to the software and adjust the design.
Common Mistakes Beginners Make
New users often make small mistakes when learning digitizing.
Some common problems include:
Too Many Small Details
Tiny shapes can be hard for embroidery machines to stitch.
High Stitch Density
Too many stitches in one area can cause fabric puckering.
Poor Stitch Direction
Wrong stitch angles may make shapes look uneven.
These mistakes become easier to avoid with practice.
Tips to Improve Your Embroidery Designs
These simple tips can help you improve your designs.
Start with Simple Projects
Begin with small designs and basic shapes.
Study Other Designs
Look at good embroidery work and notice how stitches flow.
Practice Often
Regular practice helps build skill and confidence.
Test Designs on Fabric
Always stitch a test version before final production.
These habits help you learn faster.
Why Experience Matters in Digitizing
Digitizing is both art and skill. It takes time to master stitch planning and design flow.
Experienced digitizers understand:
- Fabric behavior
- Thread tension
- Machine movement
- Stitch balance
This knowledge helps create strong embroidery files that stitch smoothly.
How Digital Tools Help Build Creativity
Free design tools also help artists grow their creativity.
With digital tools you can:
- Try new ideas quickly
- Edit designs easily
- Save many versions of your work
- Share designs with others
This freedom helps users explore new creative paths.
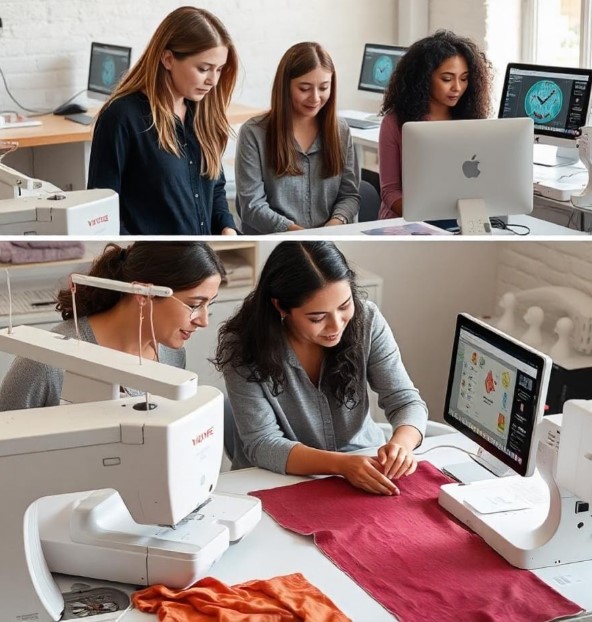
Real Experience from Embroidery Projects
Many embroidery artists start with simple free tools. Over time, they build skills and move to more advanced design work.
In real embroidery projects, good design planning makes a big difference.
A well-prepared design stitches faster and looks cleaner. Poor planning can lead to broken threads and uneven shapes.
Learning the basics with free tools is a great first step in the embroidery journey.
Final Thoughts
Creating embroidery designs with free digital tools is a great way to start learning digitizing. These tools help beginners explore design ideas and practice stitch planning without large costs.
By choosing simple images, tracing shapes carefully, and testing designs on fabric, you can create clean embroidery files that machines can stitch smoothly.
With time, patience, and practice, your skills will grow. Each design will teach you something new about stitch flow, fabric behavior, and creative planning.
Embroidery design is both art and craft. With the right tools and steady practice, anyone can learn to turn ideas into beautiful stitched designs.